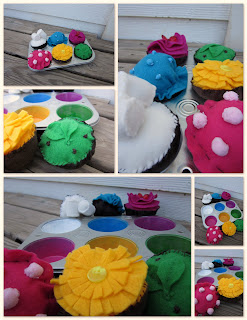
Okay, here by popular demand (well, one grandma, but who's counting!) I have created my first tutorial! Here goes!
How to Make Felt Cupcakes:
Step 1:
 |
| Find a Cupcake Liner |
Step 2:
 |
| Cut 1 cut along side of cupcake liner to the bottom, then cut around the bottom circle of the cupcake liner |
Step 4:
 |
| Trace around card stock on felt, then cut 1 of each, per cupcake |
 |
| Sew ends of your "rainbow shape" together. You can just overlap the pieces and straight stitch. |
 |
| Stitch small circle onto bottom. You can straight stitch or loop stitch. |
 |
| "Right-Side Out" |
 |
| "Inside Out" |
Step 9:
 |
| Stitch on the top piece of felt. Again, you can loop stitch or a simple straight stitch will work just fine as well. Just remember to leave a gap to put the stuffing through! |
Step 10:
 |
| Add Stuffing! |
Step 11:
 |
| Sew up hole, and voila! |
Decorate as Desired!
I just went through all of the little bits and pieces I have laying around my craft room!
Linking Up! here and :


what a fun idea! My little girl would love this! I followed you over here from Tip Junkie. Thanks for sharing!
ReplyDeleteI love these. I'm so going to make some for a non profit we do projects for. Last year we made felt owls. I think this is another great options that can be made pretty with red, white and pink. http://www.projectvalentine.org/
ReplyDeleteThat is an awesome organization, Michelle! Thanks for sharing! They are really inexpensive to make, and they'd make really good pin cushions.
ReplyDeleteThe next time I make a set, I will put button magnets in the bottom of the cupcake, so they will stick to the pan just a little bit. Of course I didn't think of that until after they were all done! :P
Hey thanks for the comment on my baby gift ideas!
ReplyDeleteThe cradle wasn't that hard! The result is worth it!!
Very cute felt cupcakes!!
Cute!! I love felt food. I have not tried cupcakes yet tho! Thanks for the tutorial!
ReplyDeleteThese are adorable. My niece is obsessed with cupcakes. What a perfect gift idea. Thanks for stopping by Saved By Love Creations today. Blessings...
ReplyDelete